TechShield Introduction
What is TechShield?
TechShield managed solutions is technology made easy. It helps you setup, use, protect and enjoy your networked devices. Combining industry-leading software and world-class support creates a customized TechShield solution for everyone. Whether it's for computers or mobile devices, TechShield combines the best security, backup and data management software.
Your service will include one license which will include support for up to 5 devices. An additional license will be required for more than 5 devices which will be billed at $4.99/month.
Installing TechShield
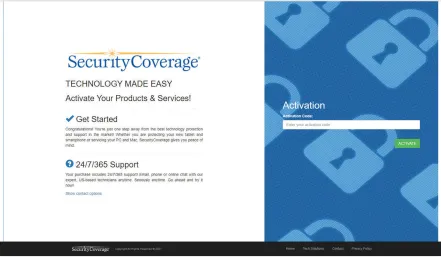
Activating and Installing TechShield
- Open the email you were sent from your service provider. This will be from support@ securitycoverage.com.
- Click the link to go to: go.securitycoverage.com.
- Enter your activation code, then your email address.
- Enter your personal information and click Activate.
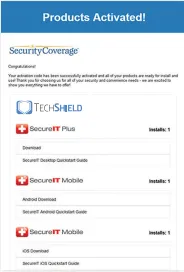
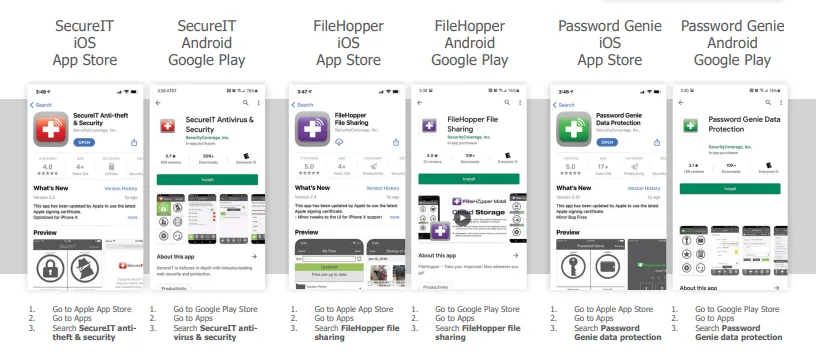
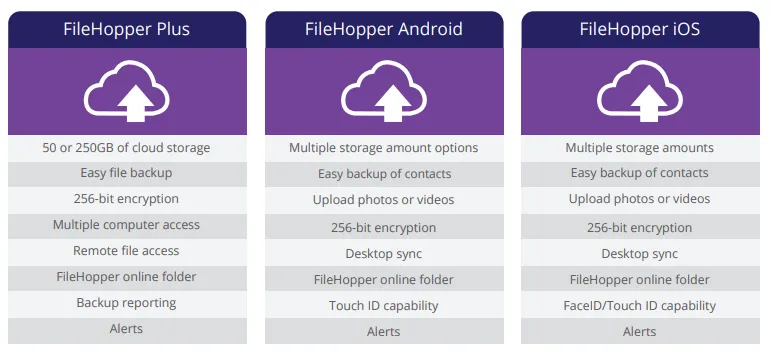
- Download all of your products. These download links will also be emailed to you (images of app store listings can be found below).
- Install all products.
SecureIT Introduction
What is SecureIT?
SecureIT anti-virus software and internet security protects your computers and mobile devices from the latest online threats. New digital threats appear every day, but with SecureIT, you get industry-leading essential protection, plus the convenience of never needing to update your software. SecureIT works silently in the background, protecting computers and mobile devices from all manner of threats.

SecureIT - Windows PC
Downloading Initial Definitions
Upon installing SecureIT, you will need to download the virus, anti-phishing and parental controls definitions. These will download automatically once you have finished your installation.
Running A Scan
SecureIT automatically keeps you safe with its Real-Time protection. However, you can also manually scan your computer for malware using our powerful scanning tools.
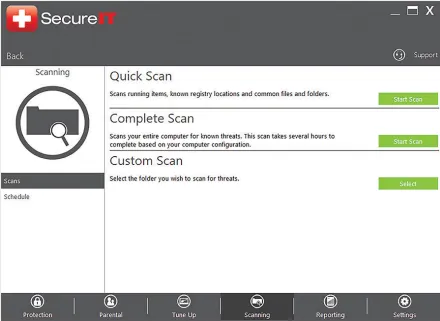
First, navigate to the Scanning page by clicking the Scanning panel on the main menu. Once on the Scanning Page, you will see three different types of scans as well as a Schedule link on the left-hand side.
To run the desired scan, simply click 'Start Scan' to the right of each scan.
You can also choose to schedule a time for SecureIT to scan your computer by utilizing the Schedule scan feature. To enable this, click Schedule on the left-hand side, then once you are on the Schedule Scan page, enable the scan using the switch on the upper right, select the desired drive to scan, pick the frequency of the scan and the desired start time from the drop-down menu.
Changing Settings
The Settings within SecureIT allow you to enable or disable the various components of SecureIT.
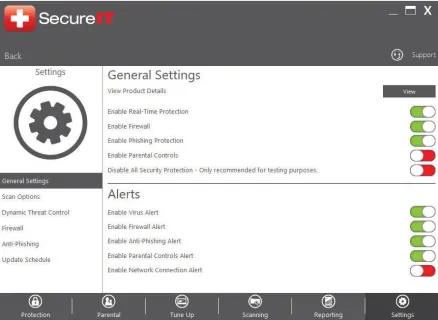
General Settings
Here you can enable/disable Real Time Scanning, Firewall, Anti-Phishing and Parental Controls. You can also enable/disable the various alerts within SecureIT.
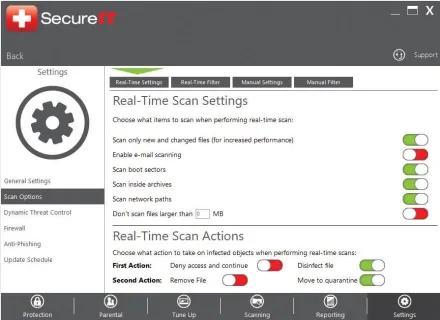
Scan Options
Here you can select the various options available to you for Real-Time and Manual Scanning.
Dynamic Threat Control
Here you can set the detection strength of SecureIT Dynamic Threat Control customizing the level of alerts.
Firewall
Here you can manage incoming and outgoing network connections.
Anti-Phishing
Here you can add sites that have been erroneously flagged as phishing sites to a whitelist so they will not be flagged as malicious by SecureIT.

Update Schedule
Here you can choose how frequently SecureIT checks for new malware definitions.
Configuring Parental Controls
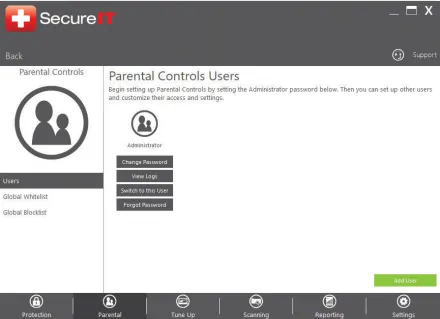
If you have SecureIT Plus, then you have access to our robust Parental Controls. To set them up, click on Set Up under Parental Controls on the main menu.
Once you have gotten to the Parental Controls screen, you will need to setup the Administrator account. To do this, click Change Password; then under New Password, enter your desired password.
Once you have setup the Administrator account, you can begin creating additional users. To add a new user, click 'Add User'. The 'Add User' popup will appear; there you will enter in the new user's name and password.
After the User has been created, you can click on Settings to change the filter categories, enable application blocks, set time controls and manually block certain sites. You can create multiple users and set them each up with their own specific settings. Each child user simply has to login under their profile within SecureIT and all parental controls settings will be applied to that user.
SecureIT Mobile - Android
After Installation
You'll see SecureIT's main menu after installation. From here you can scan your device and manage application permissions, setup your anti-theft features, adjust your parental controls, and monitor your device's activity. The first thing you'll want to do is run a quick scan to ensure your device is free of infections followed by setting up your anti-theft features. We'll walk through how simple it is to do both below. We'll also show you a short walk-through of setting up your parental control options and managing your application permissions.

Malware Scan
- Press Protection from the main menu.
- Press Scan in the middle under Malware Scanner.
- Press Start Scan on the Malware Scanner screen.
- Remove Bad Apps (if found) by pressing the red X next to any infected files.
- Device is Safe is indicated by a green Protection screen on main menu.
Enable Anti-Theft (Locate, Lock or Wipe)
Didn't enable anti-theft during installation? Not to worry, you can change these settings at any time.
- Press Anti-Theft from the main menu.
- Slide switches ON for all features you wish to activate.
.webp)
Parental Controls
- Press Parental Controls from the main menu.
- Press Manage or Blocked Sites: Manage contains the default SecureIT categories; Blocked Sites is where you can manually add individual sites you wish to be blocked.
Application Management
Want to check the permissions of your existing apps? Just use the Application Management feature to see what your apps can and cannot do.
- Press Protection from the main menu.
- Press Manage under Application Management.
- Your apps are sorted by the permissions that they use.
- Open a category to view each app that requires that permission.
- Tap on an app name to view more detailed information or remove it completely.

SecureIT Mobile - iOS
After Installation
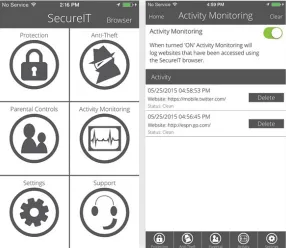
You'll see SecureIT's main menu after installation. From here you can setup your anti-theft features, enable browsing protection, adjust your parental controls, and monitor your device's activity.
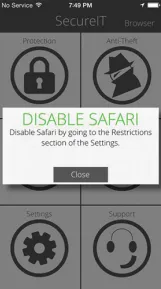
The first thing you'll want to do is disable Safari so SecureIT will act as your device's default web-browser followed by setting up your anti-theft features. We'll walk through how simple it is to do both below. We'll also show you a short walk-through of setting up your parental control options and monitoring your device's activity.
Disabling Safari
Upon installing SecureIT, you will see a prompt indicating that you will need to disable Safari. In order for SecureIT's Web Security and Parental Controls to work properly, you must use SecureIT's built-in web browser.
- Press Settings from your device's home screen.
- Press General under Settings.
- Press Restrictions under the General screen.
- Press Enable Restrictions to turn app restriction on. (If this is already enabled, skip this step.)
- Disable the Switch for Safari under ALLOW.
- Safari is now disabled.
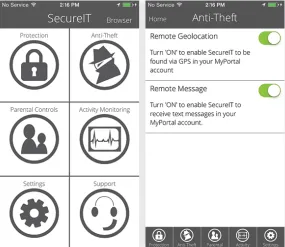
Enable Anti-Theft (Locate, Lock or Wipe)
Didn't enable anti-theft during installation? Not to worry, you can change these settings at any time.
- Press Anti-Theft from the main menu.
- Slide switches ON for all features you wish to activate.
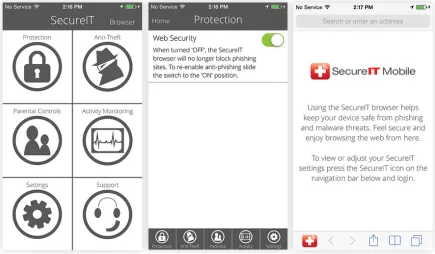
Web Security
Web Security protects you from malicious Phishing Attacks when using the SecureIT browser.
- Press Protection from the main menu.
- Slide switches ON if you wish to enable Web Security, or OFF if you wish to disable it.
- Press Browse from the main menu, opening up SecureIT's browser to keep you safe while surfing.
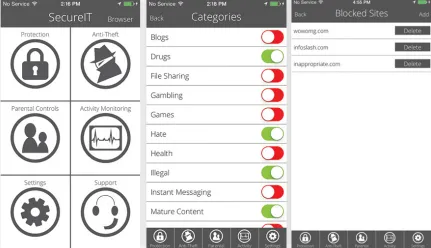
Parental Controls
- Press Parental Controls from the main menu.
- Press Manage or Blocked Sites: Manage contains the default SecureIT categories; Within Blocked Sites, you can manually add individual sites you wish to be blocked.
Activity Monitoring
- Press Parental Controls from the main menu.
- Press Manage or Blocked Sites: Manage contains the default SecureIT categories; Within Blocked Sites, you can manually add individual sites you wish to be blocked.
FileHopper Introduction
What is FileHopper?
FileHopper online backup software is the easiest way for you to backup your files. It only takes one incident to see the value of FileHopper; one hard drive crash, one fire, one accidental deletion and all of your valuable files and precious memories are gone. FileHopper for desktop & mobile devices backs up files with 256 bit encryption so you know they are safe.
FileHopper - Windows & Mac
After Installation
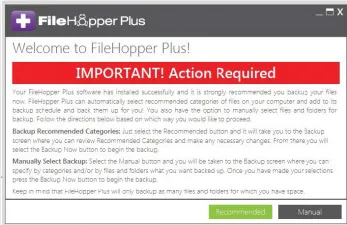
You'll see an "Action Required" immediately following installation. Here you will decide how to set up your first backup. You can either select our recommended backup or select your own categories/files/folders for backup.
Backup
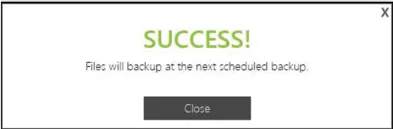
If you selected Recommended, you will see a Success message, indicating that your files will be backed up as scheduled. This allows you to "set it and forget it".
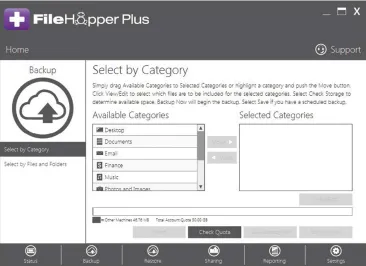
If you selected Manual, you will see the Select by Category screen:
- Select Categories, Files, and/or Folders you would like to backup.
- Select Backup Now to start the backup OR
- Select Save to let it backup on a regular schedule.
Share
Easily share your file and folders between your desktop and mobile devices.
- Look for the FileHopper Folder located on your desktop.
- Simply drag and drop your folders and files into the FileHopper Folder.
- If you have FileHopper on your mobile device you will see the files and folders you shared from that device here.
- A syncing symbol appears on all files and folders.
- A green checkmark appears when syncing is complete.

FileHopper Mobile - Android
After Installation
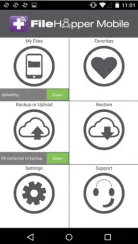
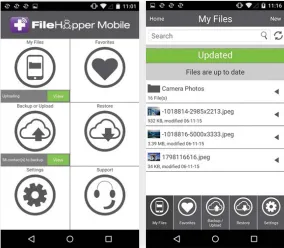
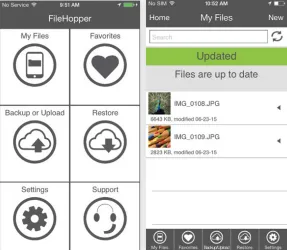
You'll see the FileHopper Main Menu after installation. From here you can navigate to My Files, Favorites, Backup/Upload, Restore, Settings, and Support. You can also see the status of your uploads and backups.
The first thing you will want to do with FileHopper is to Backup Contacts/Call History/Text messages and Upload Files/Photos.
The quickest way to get going with FileHopper is to upload a photo and view it. Of course, you'll need to have a photo on your device to follow along. If you don't, snap a picture and we'll show you how to upload and save it.
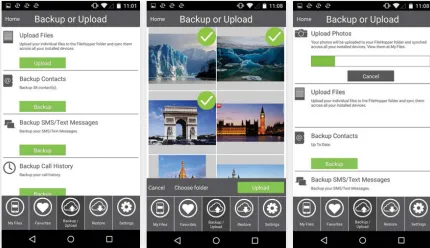
Upload A Photo
- Press Backup or Upload from the main menu.
- Press Upload Photos at the top of the screen.
- Press Photos. A check mark will appear to show which photos have been selected.
- Press Upload.
View Photo
- Press My Files from the main menu. Your uploaded photos will appear here.
Backing up Contacts, Call History, and Text Messages is very simple, and can be a life saver if your device ever gets lost or destroyed.
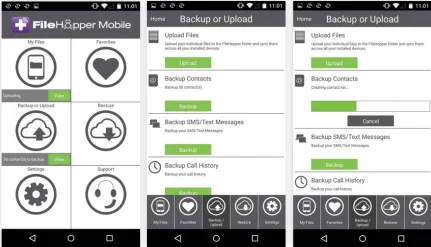
Backup
Backing up Contacts, Call History, and Text Messages is very simple, and can be a life saver if your device ever gets lost or destroyed.
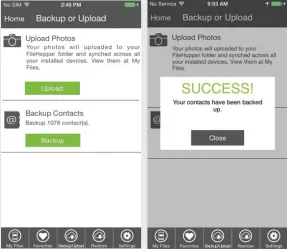
- Press Backup or Upload from the main menu.
- Press Backup under Contacts, SMS/Text Messages, or Call History. A progress bar will appear during the backup. You will see "Up To Date" when the category that you selected has finished backing up.
FileHopper Mobile - iOS
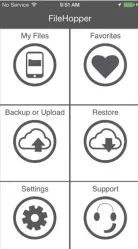
After Installation
You'll see the FileHopper Main Menu after installation. From here you can navigate to My Files, Favorites, Backup/Upload, Restore, Settings, and Support. You can also view statuses of your uploads and backups.
The first things you will want to do with FileHopper is to Backup Contacts and Upload Files/Photos.
The quickest way to get going with FileHopper is to upload a photo and view it. Of course, you'll need to have a photo on your device to follow along. If you don't, snap a picture and we'll show you how to upload and save it.
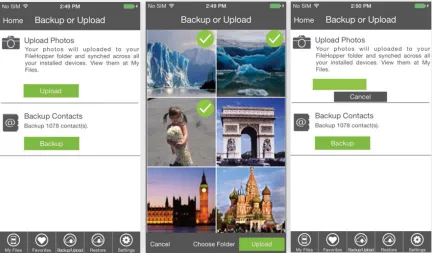
Upload A Photo
- Press Backup or Upload from the main menu.
- Press Upload Photos at the top of the screen.
- Press Photos. A check mark will appear to show which photos have been selected.
- Press Upload.
View Photo
- Press My Files from the main menu. Your uploaded photos will appear here.
Backup
Backing up Contacts is very simple, and can be a life saver if your device ever gets lost or destroyed.
- Press Backup or Upload from the main menu.
- Press Backup under Contacts. A progress bar will appear during the backup. You will see "Up To Date" when Contacts has finished backing up.
Password Genie Introduction
What is Password Genie?
Password Genie password manager, data protection and password security software is your digital wallet. It's no secret that identity and password theft is on the rise. You need a password manager because keeping track of so many online logins is a pain. Password Genie keeps your digital identity safe and convenient to access.

Password Genie - Windows & Mac
After Installation
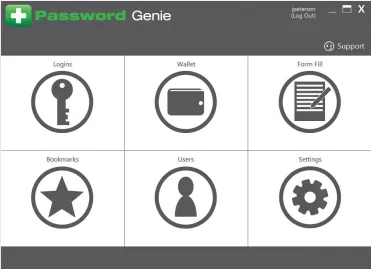
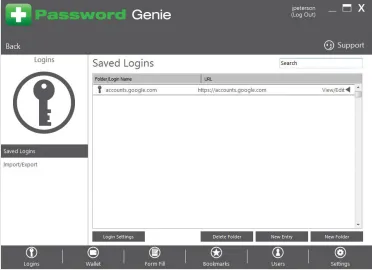
You'll see the Password Genie Main Menu after installation. From here you will see Logins, Wallet, Bookmarks Formfill Settings and Support. You can also see statuses of strength of passwords, Expired Credit Cards and Birthday Reminders.
The first thing you’ll want to do with Password Genie is to create Logins The Quickest way to create a login is to choose the Logins tab and follow these easy steps below in creating your first login.
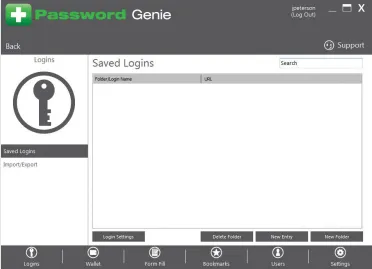
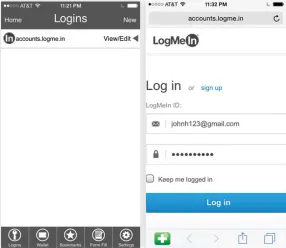
Logins
Once in the Logins tab you will be greeted by the landing page for Logins. This page provides the steps on what is next. We want to create a New Login, once New is selected you have the choice of creating a Login Entry or a New Folder. Let's choose Login Entry to continue our quest in creating a Saved Login.
Once Login Entry is selected you will be automatically taken to the New Login > Create Entry screen. Here you will see the necessary fields to complete a Login.
Saved Login Description (give your Login a name for easy recognition)
- Website URL (web page address goes here. EXAMPLE: https://accounts.google.com)
- Username/Email (johnH123@gmail.com)
- Password (Includes Password Strength Rater. Password Genie will report if your Password is safe enough.)
- Notes (Enter anything you wish here)
- Folder Options (for simple organization)
- Generate Password (That’s right Password Genie can create Passwords for you!!)
Once your desired fields are filled out, Press Save button to complete the login entry. After the login has been saved the information will be stored in your Login tab of the Main Menu.
Here you can View/Edit your entry at any time.
How can you have Password Genie log you into your saved Login Entry? Simply press on the URL (of the desired login) in the Logins section and webpage will open the machines default Broder and will do the rest.

Password Genie Mobile - Android
After Installation
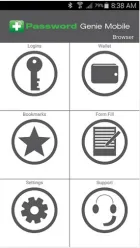
You'll see the Password Genie Main Menu after installation. From here you will see Logins, Wallet, Bookmarks Formfill Settings and Support. You can also see statuses of strength of passwords, Expired Credit Cards and Birthday Reminders.
The first thing you'll want to do with Password Genie is to create Logins The Quickest way to create a login is to choose the Logins tab (see above) and follow these easy steps below in creating your first login.
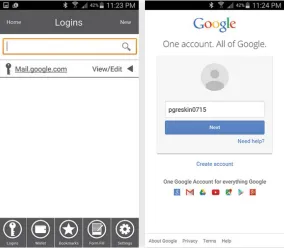
Logins
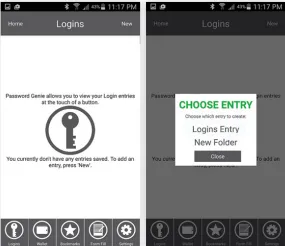
Once in the Logins tab you will be greeted by the landing page for Logins. This page provides the steps on what is next. We want to create a New Login, once New is selected you have the choice of creating a Login Entry or a New Folder. Let's choose Login Entry to continue our quest in creating a Saved Login.
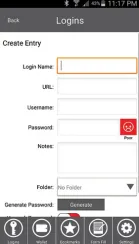
Once Login Entry is selected you will be automatically taken to the New Login > Create Entry screen. Here you will see the necessary fields to complete a Login.
Saved Login Description (give you Login a name for easy recognition)
Website URL (web page address goes here. EXAMPLE: https://mail.google.com)
- Username/Email (johnH123@gmail.com)
- Password (Includes Password Strength Rater. Password Genie will report if your Password is safe enough.)
- Notes (Enter anything you wish here)
- Folder Options (for simple organization)
- Generate Password (That's right Password Genie can create Passwords for you!!)
Once your desired fields are filled out, Press Save button to complete the login entry. After the login has been saved the information will be stored in your Login tab of the Main Menu.
Here you can View/Edit your entry at any time. How to have Password Genie log you into your saved Login Entry? Very Simple.... press on the URL (of the desired login) in the Logins section and the built in Password Genie Browser will do the rest.
Password Genie Mobile - iOS
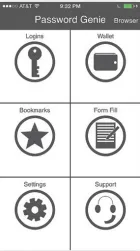
After Installation
You'll see the Password Genie Main Menu after installation. From here you will see Logins, Wallet, Bookmarks Formfill Settings and Support. You can also see statuses of strength of passwords, Expired Credit Cards and Birthday Reminders.
First thing you'll want to do with Password Genie is to create Logins The Quickest way to create a login is to choose the Logins tab (see above) and follow these easy steps below in creating your first login.
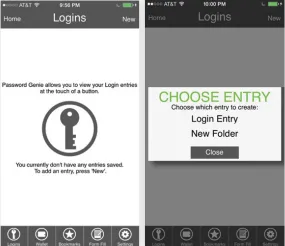
Logins
Once in the Logins tab you will be greeted by the landing page for Logins. This page provides the steps on what is next. We want to create a New Login, once New is selected you have the choice of creating a Login Entry or a New Folder. Let's choose Login Entry to continue our quest in creating a Saved Login.
Once Login Entry is selected you will be automatically taken to the New Login > Create Entry screen. Here you will see the necessary fields to complete a Login.
- Saved Login Description (give you Login a name for easy recognition)
- Website URL (web page address goes here.
- EXAMPLE: https://mail.google.com)
- Username/Email (johnH123@gmail.com
- Password (Includes Password Strength Rater.
- Password Genie will report if your Password is safe enough.)
- Notes (Enter anything you wish here)
- Folder Options (for simple organization)
- Generate Password (That's right Password Genie can create Passwords for you!!!)
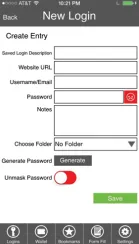
Once your desired fields are filled out, Press Save button to complete the login entry. After the login has been saved the information will be stored in your Login tab of the Main Menu.
Here you can View/Edit your entry at any time. How to have Password Genie log you into your saved Login Entry? Very Simple.... press on the URL (of the desired login) in the Logins section and the built in Password Genie Browser will do the rest.