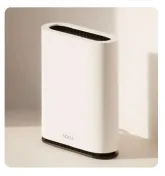
1. Set Up
You will need Quick Setup Guide, power cable, Ethernet cable, and the Beacon 6.

2. Download
Download the Nokia app and scan QR code on bottom of Beacon.

3. Plug In
Plug in the power adapter and then connect it to the back of your Beacon 6.

4. Power On
Push the on/off button, the LED on the front of the device will turn on.

5. Connect the Ethernet Cable
Connect the end of the Ethernet cable to the available outlet in your home. Plug the Ethernet cable into the blue WAN port on your Beacon 6.

6. Ready
The app will tell you when the Beacon is ready, and the LED on the Beacon turns blue green.

7. Create an Account
Create an account to access your network remotely.

8. Connect to Wifi
Connect your devices using the SSID and Wi-Fi Key shown on the bottom of the Beacon 6.

9. For Corner-to-Corner Coverage
To connect a second Beacon, click "Network" and then the plus sign. The app will help you identify the right position for the Beacon and test the signal in the new location.

10. Second Beacon in Place
Scan the QR code on the bottom of the second Beacon and plug it in. It will connect to the first Beacon and reconfirm it has a good connection.
11. Give the Beacon a Name
You can give the Beacon any name you want, an example could be the name of the room in which it is installed.

Customer Service
Need More Help?
For more information or troubleshooting support, contact LFT Customer service.
99-FIBER
337.993.4237